Do you have a projector that needs its lens reassembled? You don’t need to be an expert technician to put it back together and get your presentation going again.
In this blog post, we’ll walk you through the steps for disassembling and reassembling a projector lens, whether it’s for replacing components or just checking the status of the parts inside.
Gather the necessary tools and components
Before getting started, you’ll need to gather a few tools. These include the projector’s manual, an eyeglass screwdriver or a small Phillips head screwdriver, tweezers, and any replacement parts that may be required.
Additionally, you may also want to wear gloves while working with projectors due to the risk of electric shock or contamination from dust and dirt.
Types of the projector lens
The first step is to identify the type of projector lens you’re working with. They can be categorised into two types – manual or automatic focus lenses.
Manual focus lenses require adjusting the lens manually after removing it from the projector using a screwdriver or tweezers. Automatic focus lenses, on the other hand, are adjusted using a knob on the projector, and do not require manual adjustment of the lens.
Disassembling the lens
Once you know what type of lens you’re working with, it’s time to start disassembling.
If you’re dealing with a manual focus lens, use your screwdriver or tweezers to carefully remove it from the projector housing. Be sure to keep track of the screws and other components you remove during the process.
Once removed, use your tweezers to carefully take out any pieces or components that might need to be replaced.
For automatic focus lenses, there is no need for further disassembling. Simply adjust the lens using the knob on the projector and then reassemble the projector housing.
How To Put Projector Lens Back Together
Here are the steps to reassembling a projector lens:
Unscrew the Lens Cap
Start by unscrewing the lens cap with your screwdriver and setting it aside.
Insert Components
Next, use your tweezers to carefully insert each component back into its place in the projector housing. Make sure they fit correctly before proceeding to the next step.
Replace Parts
So if any of the components need to be replaced, do so now. Make sure the new parts fit into the projector lens securely.
Plus, double-check for any loose screws and secure them if necessary.
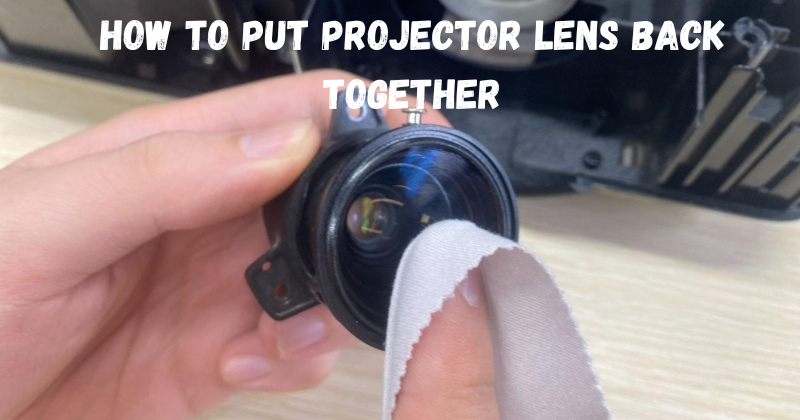
Clean Lenses
Using a soft cloth or lens cleaner, gently wipe the lenses to remove any dust or dirt.
Screw on Lens Cap
Finally, screw the lens cap back onto the projector housing and you’re done! Your projector is now ready to be used again.
Tips for Protecting Your Projector Lens
To ensure your projector lens remains in good condition for longer, take the following steps:
- Avoid touching the lenses with your bare hands as this can leave smudges and fingerprints.
- Make sure to clean off any dust or debris from the lenses regularly.
- If you’re not using the projector for an extended period of time, be sure to store it in a dry environment away from extreme temperatures.
With these steps and tips, you can now confidently disassemble and reassemble your projector lens and get your presentation going again.
Now that you know the basics of how to put a projector lens back together, you’ll always have a handy guide when needed. Don’t let a malfunctioning projector stop you from getting your message across.
Troubleshooting Guide
If you encounter any issues while disassembling or reassembling the projector lens, refer to this troubleshooting guide:
- Make sure you have all the necessary tools and components before getting started.
- When removing screws, ensure you are using the correct screwdriver size for each one.
- If a component won’t fit back into place correctly, double-check that it is not damaged or worn out and replace it if necessary.
- Check all connections before reassembling the projector lens to make sure they are secure.
This guide should help you get your projector lens up and running again in no time.
FAQs
How do you shift a projector lens?
Projector lenses are shifted using either manual or automatic focus lenses. Manual focus lenses require adjusting the lens manually after removing it from the projector using a screwdriver or tweezers, while automatic focus lenses can be adjusted using a knob on the projector.
Do all projectors have lens shift?
No, not all projectors are equipped with lens shift. Some projectors may have manual or automatic focus lenses, while others may not have them at all. Be sure to check your projector’s manual for more information.
Is it necessary to wear gloves when handling a projector lens?
Yes, it is recommended to wear gloves when working with projectors due to the risk of electric shock or contamination from dust and dirt. You may also want to wear protective eyewear while handling projector lenses.
How often should I clean my projector lens?
It’s recommended that you clean your projector lens every few months, depending on how much you use it. Using a soft cloth or lens cleaner, gently wipe the lenses to remove any dust or dirt. This will ensure optimal performance and extend the life of your projector lens.
Conclusion
Overall, if you want to put your projector lens back together correctly, you need to be careful and precise in the way that you handle it.
Follow these instructions step-by-step and take your time reconnecting all of the components.
Take a few extra minutes to double check all of your work before powering on the device, and don’t be afraid to enlist help from a more technically savvy friend or colleague if necessary.
By being patient and methodical, you can make sure that you have done everything correctly and restored your projector lens safely.