Are you a passionate gamer looking for ways to up your gaming experience?
Nintendo Switch is the perfect console that gives players ultimate freedom and customization.
With its portability and versatility, you can now take along your Nintendo Switch with you wherever you go.
In this blog post, we’ll be discussing how to connect the Nintendo Switch to a projector so that you can share your gaming experiences with friends in an even bigger way.
Understand the basics of connecting a Nintendo Switch to a projector
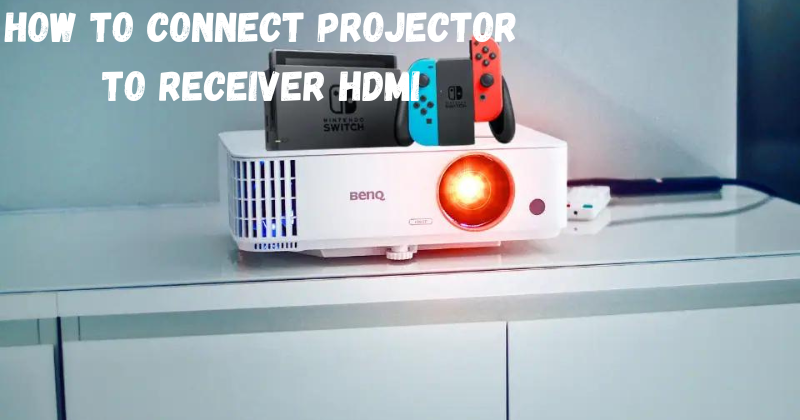
The Nintendo Switch is designed to be connected to a TV, but it can also be connected to a projector. To do so, you’ll need the following components:
- HDMI cable
- Dock plug
- Adapter
- Projector with an HDMI port
Once you have all the necessary components and cables, you’ll need to connect the Nintendo Switch to the projector.
How To Connect Nintendo Switch To Projector
Here are the steps you’ll need to follow in order to connect your Nintendo Switch to a projector:
- Connect the HDMI cable from the projector’s HDMI port to the adapter.
- Connect the other end of the adapter into the dock plug.
- Plug in the dock plug into an outlet and turn on both devices (the Nintendo Switch and projector).
- Put the Nintendo Switch into its dock and make sure that it is connected to the same outlet as the projector through the adapter.
- Select video output settings on your Nintendo Switch’s System Settings menu and set it to 1080p or higher resolution depending on your projector’s capabilities.
- You should now be able to enjoy gaming with Nintendo Switch on a larger screen.
Determine if your projector has an HDMI port
Before you attempt to connect your Nintendo Switch to a projector, it is important to determine if the projector has an HDMI port and whether or not it’s compatible with the Nintendo Switch.
If the projector does have an HDMI port, you’ll need to check the specifications of your projector and make sure that it is compatible with the Nintendo Switch.
Considerations before connecting your Nintendo Switch to a projector
Before you connect your Nintendo Switch to a projector, there are some important considerations that you’ll need to keep in mind.
First, make sure that the projector is well-suited for gaming. Many projectors don’t have high enough refresh rates and can cause lag or stuttering issues while playing games.
You’ll also want to make sure that your projector is set up in a room with good lighting so you can clearly see what’s happening on the screen.
Finally, keep in mind that connecting a Nintendo Switch to a projector will drain the battery faster than normal due to its increased brightness and resolution. You may want to consider using a power adapter or charging station for your Nintendo Switch while playing on the projector.
Choose the right cables for your setup
When you’re connecting your Nintendo Switch to a projector, it’s important to choose the right cables. You’ll need an HDMI cable that is long enough to reach from the projector to the dock and a USB-C power adapter for charging your controller while playing.
You may also want to consider using a longer HDMI cable so you can have more flexibility when setting up your projector.
Set up your projector according to manufacturer instructions
Once you have the right cables and components, it’s time to set up the projector according to manufacturer instructions. Make sure to follow all safety protocols when handling a projector as they can be quite fragile.
Be sure to adjust the brightness and contrast levels of your projector so that you get optimal image quality from your Nintendo Switch gameplay.
Power on both devices and configure audio settings accordingly
Once the projector is set up, power on both the Nintendo Switch and the projector. You’ll then need to configure audio settings accordingly so that you can hear your game clearly.
If your projector has multiple audio output options, choose the best one for your setup. For instance, if you’re using a surround sound system with your projector, make sure that the audio output is set to 5.1 surround sound.
Have fun and enjoy your gaming experience on a larger screen
Now that you know how to connect your Nintendo Switch to a projector, it’s time to have some fun! You can now share your gaming experiences with friends in an even bigger way and take advantage of all the features that the Nintendo Switch has to offer.
Whether you’re playing with friends or against them, you can now have an immersive and unforgettable gaming experience on a larger screen. So what are you waiting for? Get your Nintendo Switch connected to a projector today!
Happy gaming.
FAQs
Can I hook a Nintendo Switch up to a projector?
Yes, you can hook up a Nintendo Switch to a projector with the use of an HDMI cable, adapter and dock plug. However, make sure that your projector is suitable for gaming and also has compatible audio output settings configured.
Why is my Nintendo Switch not projecting?
If your Nintendo Switch is not projecting, it could be due to several reasons. First, make sure that the HDMI cable is securely connected and that all components are compatible with each other. Also, check the audio settings on your projector to ensure they’re configured correctly.
What kind of projector do I need for my Nintendo Switch?
The kind of projector you need for your Nintendo Switch will depend on the resolution and refresh rate of the projector. Make sure to check the specifications of your projector to make sure it is compatible with the Nintendo Switch. You should also be aware that projectors can cause lag or stuttering when playing games due to their lower refresh rates.
Conclusion
In conclusion, connecting your Nintendo Switch to a projector is a great way to enjoy your gaming experience in an even bigger and better way.
Whether you are looking to impress your friends with a larger screen or just upgrade from a regular television set, the results can be awesome.
All you need is the right cables or adaptors, access to the settings on your device as well as on the projector, and above all else, patience.
Follow the steps outlined in this blog post, go through the process carefully and patiently, and we guarantee that you’ll be able to easily connect Nintendo Switch to projector with no issues.